6 Things To Do Before Bugging Out On Foot

Pre-planning is a vital part of every outing whether bugging out or a simple hike. What trail do you plan to take? What route will you follow if walking out of town? Here are six tasks to complete before heading out, to make the trip safer.
Review the Route
Identify the trail or route you plan to take. Do a little internet research and check out the route on a topography map (which you should take with you). Look for the potential risks and rewards.
Risks
Risks include weather, topography, altitude, climate, expected vegetation, and more. Identifying these items ahead of time will help you to pack accordingly and serve as reminders when you are on the trail. These indicators will help to gauge fatigue level to avoid overexertion as well as potential indicators that you may be off course.
Rewards
 Hiking should always have a sense of adventure. It should never be just about the risks. Identify key waypoints along the trail to visit such as scenic overlooks, historical markers, landmarks, wildlife areas, and more. Make sure to visit these locations as it can bring a new respect to life, history, and the land we live in. Our world truly is an amazing place, be sure to take in the sights when you can, you may not get another chance.
This goes for bugging out on foot as well. While it’s probably not a good time to stop for sightseeing, Enjoy the sense of adventure. Look for the positives to keep up morale, while staying aware of your surroundings.
Pay Attention
Maintaining situational awareness is paramount at all times. Whether in the parking lot at the grocery store or on the mountain trail, situational awareness is key to identify potential risks or threats, before they become an issue. The simple task of staying aware can be the number one factor to keep you alive and injury free, so you make it home at the end of the journey.
Landmarks
Pay attention to landmarks throughout your hike. They can be key indicators that you may be off trail and can also lead you back on track in the right direction.

Navigating in Caprock Canyon with Osprey Daylite Plus Pack and Garmin Fortrex 401
Look at Things Backwards
Check your six every now and then while on your hike and observe how the trail looks from the opposite direction. Check for landmarks in this direction as well. In many cases, you will be taking the same route to get home and the trail can look different when approaching from a different direction. “Checking your six” will improve your situational awareness and give you a chance to observe what the trail will look like on your return route.
Mark Your Bearings
This process starts from your departure point. Mark a GPS waypoint or shoot an azimuth to confirm your heading. Review your surroundings observe the landscape and landmarks before you depart.
Once on The Trail
Continue the above process through your trek to ensure you’re headed in the right direction. Mark your bearings if you must leave the trail, or make a turn that doesn’t seem obvious or could be easily missed.
Use signals or markings to denote the location so you know when you encounter it again. Line up sticks or rocks to make an arrow in the direction you are traveling. Lean a large fallen branch on the trunk of a tree, or use a piece of charcoal from a campfire to mark an arrow.
Pack a Trail Map
 Bring a trail map with you. At a minimum, trail maps can be found at most ranger stations or other visitor centers in the area around your hike. Look for a map that includes details of the trails you plan to hike and the topography of the area. This will help to identify the terrain you will be facing.
Physical Maps are Key
A physical map like the National Geographic Trail Map Series is a priceless tool if you get off course or want to check your route. You can also download topography maps in PDF for free using this tool from USGS.gov but the trail information is limited and the interface is clunky and difficult to use.
Avoid the Apps
Yes, there are apps for that, but it forces you to use battery on your phone which should be reserved for pictures and emergencies. It is a great backup, but don’t make it your primary navigation tool. If you must, look for an app that will download maps and run offline in case you don’t have a cell signal.
More importantly, get off the tech, practice land navigation with real maps, and enjoy the outdoors.
Pack Your Emergency Gear
Pack the gear you will need if something goes wrong. Planning a day trip? Pack emergency gear to cover you long enough for an overnight. Our article on What to Bring on a Day Hike to Make It Home Safe is a great list of items to consider so you are prepared if the unexpected occurs.

ESEE Izula II and Emberlit Stove
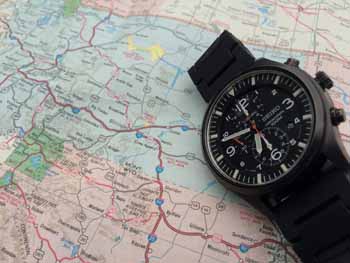
Examine Trip Duration and Timing
Just as you would with a road trip, check the duration of your trip and expected time of completion. Unfortunately, there is no Google Maps to do this for you automatically, it takes a little brain power but is a great land navigation skill to practice.
 Compare the expected arrival time to when sunset is supposed to occur. Try to give yourself enough time to arrive before sunset so you aren’t traveling in the dark.
Hiking at night is definitely achievable, but a totally different ball game. Depth perception becomes limited, and it can be extremely easy to become disoriented. Trails can be lost due to limited visibility, markers can be easily missed, as can potential hazards such as uneven terrain, cliffs, etc.
Additionally, if you are doing an overnight trip, it can be more challenging to gather wood, start a fire, and set up camp in the dark. You may want to save a little daylight to get these tasks done faster.
Wrap Up
What planning tasks do you complete before leaving the house on your outings? Please share them with our readers in the comments below. Don’t have any? Now is a great time to start! Pick a few from this article and add some additional peace of mind to your next adventure!
Know How to Check the Weather While on Foot?
Check out this video article and get our free NOAA Weather Radio Channel Quick Guide below.